

To add a new user in WordPress and assign them the role of “Author” or any other role to let them write blog posts, follow these steps:
1. Log in to WordPress Admin Dashboard
2. Navigate to Users Section
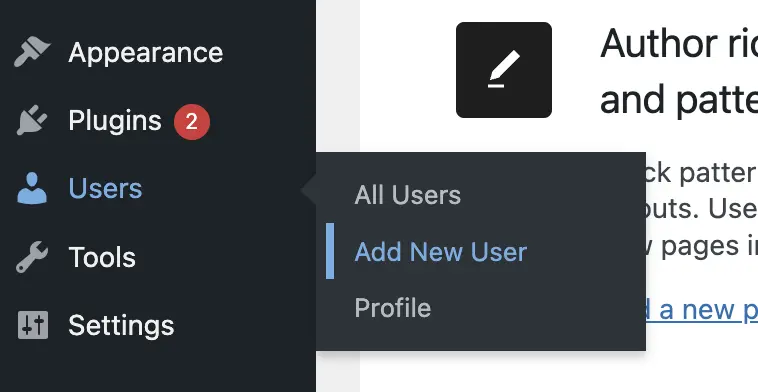
- From the left-hand sidebar, hover over Users and then click on Add New.
3. Fill in User Details

- Username: Enter a unique username for the new user.
- Email: Enter the user’s valid email address (important for password resets).
- First Name and Last Name: (Optional) Fill in the user’s real name.
- Website: (Optional) You can add a URL for their personal website if applicable.
- Password: Click Show Password to generate one automatically or create a strong password manually.
- Send User Notification: Tick this box to send the user an email about their new account.
4. Assign a Role
- Role: From the dropdown, choose the role you want to assign. If you want the user to write blog posts, choose Author, Editor or Adminisdepending on their access level:
- Administrator: Has access to all the administration features.
- Editor: Can manage and publish posts (including those of other users).
- Author: Can write, edit, and publish their own posts.
- Contributor: Can write and manage their own posts but cannot publish them.
- Subscriber: Can only manage their profile.
5. Click “Add New User”
- Once all details are filled out, click the Add New User button.
The new user will receive an email with their login information and can begin writing blog posts under the role you’ve assigned.